Wednesday, February 13, 2019

Our floor is finally done, done, done!

The final chapter of our floor saga has been completed.  With the risk of boring a lot of you who have seen much of this already, I thought it might be enlightening to review the entire struggle.  

As we traveled through 2013's trip, we began to notice a little softening of the tile in front of the refrigerator.  At first we wondered if we were imagining it, then as the year progressed, we knew it was soft.  We figured we'd wait to truly investigate until we got to Florida for the winter and had time to figure it out.

I should interject that our coach came with tile throughout the front, living area, hallway, and toilet compartment, with carpet in the bedroom.  It was a very hard glossy porcelain  tile.  If we had ordered the coach, which we didn't, neither one of us would have wanted a glossy tile.  See this is one of the small efforts to convince ourselves that this journey had desired outcomes:-)

So when we got settled into our winter digs in Dec 2013, we decided to pop up the soft tile and see what we would see.  OMG!  Black rot.
This was the initial discovery in Dec 2013

And as we expanded looking for non rotted wood,
the area got bigger and bigger
I can tell you this was a devastating moment.  It had been leaking behind our refrigerator through a panel in the wall that was not sealed properly at the factory completely unknown to us.  We at first wondered if this was even repairable, then we calmed down and tackled it one step at a time.
This was after we had gotten the rot out.
New plywood installed, but we knew we had just begun

The initial living arrangement
This was January 2014
You can see the tile still in the hallway in the above picture, and at the very bottom.  Jan and I went back and forth as to what to do, what do we replace it with, are we going to do it, are we going to hire someone to do it, etc?  We finally decided to install new tile in the galley area, the hallway, and the toilet compartment.  And that meant we had to remove all the rest of the tile in the hall and toilet compartment.  I have to say, removing tile ranks up there with the absolute worst jobs you can imagine.  To say this tile is hard is an understatement.  But we worked out a routine.  I would get the bar inserted just under the lip of the tile, Jan would cover it up with a towel to protect us, and then I would wail on it with a hammer until the bar slipped.  We would pick up the big pieces, there were few and vacuum the small pieces, there were many, and we would inch our way, about one tile every 30 minutes!  Also being very careful wearing gloves because the shards of tile that exploded off the bar were as sharp as glass.  We definitely don't recommend anyone doing this job.

After our demo we arranged with a tile man who was willing to do this small job.  He did a nice job, and researched a mortar that he felt was the very best for installation in a vibrating, flexing, going down the road motorhome, and we trusted him.
Demo in progress

Demo complete, ready for the tile

The tile installed and looking great!
At this point we were getting ready for a return trip to Alaska and felt it better to just rip out the rest of the tile forward, at least to the seats, cover the floor in plywood, and by then, we had decided to wait to install engineered wood when we returned in the fall.
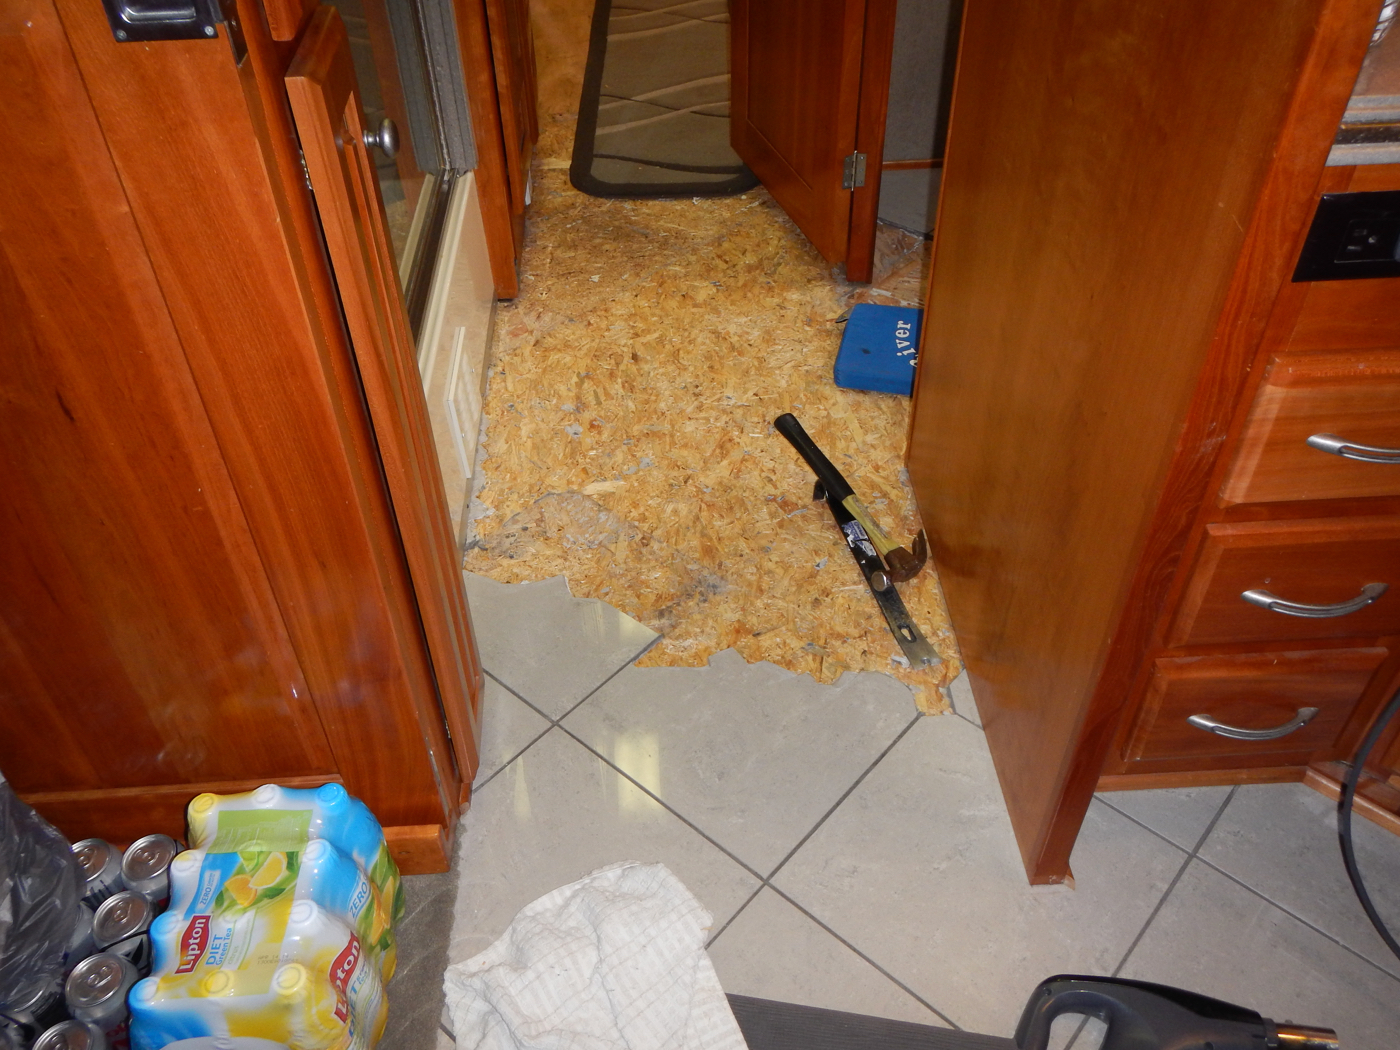
Demo continuing, and getting harder and harder

Finally got the brainstorm of just ripping up the entire plywood layer
with the tile still attached

And with new plywood installed, we left for Alaska
We set up an appointment with Ernie in Weatherford Texas who had a great reputation for installing engineered flooring in motorhomes for November when we were heading back.  He charges a set fee per day and you can help to a degree and certainly with the demo to save time and money.  Remember we still had from the rear of the front seats forward under the dash to demo, and I can sure understand Ernie VERY willing to let you do that instead of him.  So in November we parked at Ernie's place and proceeded over the weekend to remove the last of the tile, another back breaking horrible experience, and one we never wanted to repeat.
Finishing up the last of the tile demo
So after we helped rip out all the carpet, so easy after the tile and remove the 3 million, 200 thousand staples they had used on the carpet, Ernie was ready to start installing wood.
Ernie getting the floor level


Bedroom almost done 
He continued through the coach and completed the wood floor and reinstalled carpet on our slide.  And we were all set and very happy.  Wow, all done and beautiful!
Almost done out front

Done!
So fast forward to fall of 2016.  We were in Oregon about to go to an appointment to have a few items done on the coach, and as I was retracting the slide to get ready to go ,there was a tremendous CRACK, like a gunshot, and all I could think was the slide mechanism broke and the slide fell out.  What the hell?  One of the the tiles that a slide roller traveled over had broken!  So I taped it as well as I could, retracted the slide, and proceeded to the appointment.  I had them take a look, and after tapping around the tile floor, Erik announces, that whatever mortar we had used was no good and we could expect all the tiles to pop up at one time or another.  What?!?  Well we decided to just wait and see and in the meantime we would insert a piece of plywood until we could repair the tile.
Where we pulled up the busted tile
You can see on the plywood there is no indication of the mortar sticking

Our plywood insert
So we lived with it for a year that way and sure enough we could feel a tile here or there getting loose.  So in Dec of 2017, we decided to replace the plywood with a piece of tile, which we would silicone into place, then grout.  Well that was short-lived, on the second slide retraction, it busted into pieces, so back in went the plywood.

So in Feb of 2018, we worked on coming up with a solution, what should we do?  Replace the tile with more tile, wood, cork, bamboo, what?  Finally Jan was zeroing in on wood, and we tried several samples and ideas.
Different sample with our plywood insert in the background
So we contacted Ernie again to see if he had an opening in November and would be willing to do this small job. By this time we had decided to do wood in the galley, and hallway and we would install tile in the toilet compartment.  He said he would, so we made an appointment.

But first we would need to do the demo and prep work.  And that included removing tile, the job we swore we would never do again.  But we found out that because of the poor choice of mortar, that job was a thousand times easier than we expected, in fact we finished it up in a few hours.
Demo begins, as you can see there are places the mortar stuck
to the floor and other places where it stuck to the tile,
but basically it didn't stick at all


Almost done
We then decided to remove as much of the plywood as we could and put in new, screw it down and level it if necessary so Ernie wouldn't have to do any prep, or hopefully, only a little.
New plywood installed

You can see the hundreds of screws we put in
as Jan applies floor leveler
And as it turned out, Ernie only needed to do a little bit more prep and started installing wood almost immediately.
Ernie at work

All done!!
Well that left just the toilet compartment that we planned to do.  Jan picked out some tile she liked, a pretty 2" X 4" tile and we planned to put down cement board for rigidity, but we got into a discussion with one of our friends here, Phil, who recommended a product called Ditra, a plastic decoupling membrane that he had been having great results with.  Sure enough after researching it, we decided to use it for our floor.
The floor we would be tiling

Toilet out and ready to measure and fit

Harold and I cutting the Ditra
We received a lot of help from our good friend and neighbor, Harold which was very much appreciated.  Now the way the Ditra is used is to spread mortar on the subfloor then press it down into the mortar, then spread mortar on the top of the Ditra and install the tile.  But first the Ditra and tile needed to be cut to fit.  We rented a wet saw and went at it.
Harold and I fighting the lousy wet saw I rented:-)

Jan working the puzzle to get it all dry fitted
Once that was done, down went the Ditra, and then the tile.
Applying the first coat of mortar

Ditra in place

Jan fitting the tile over the second coat of mortar

Tada!
Ha, then the waiting game without a toilet:-)  Only 20 hours, but seemed a long time.  Then the grouting, and the toilet!
Working on shimming the floor for the toilet

Grout

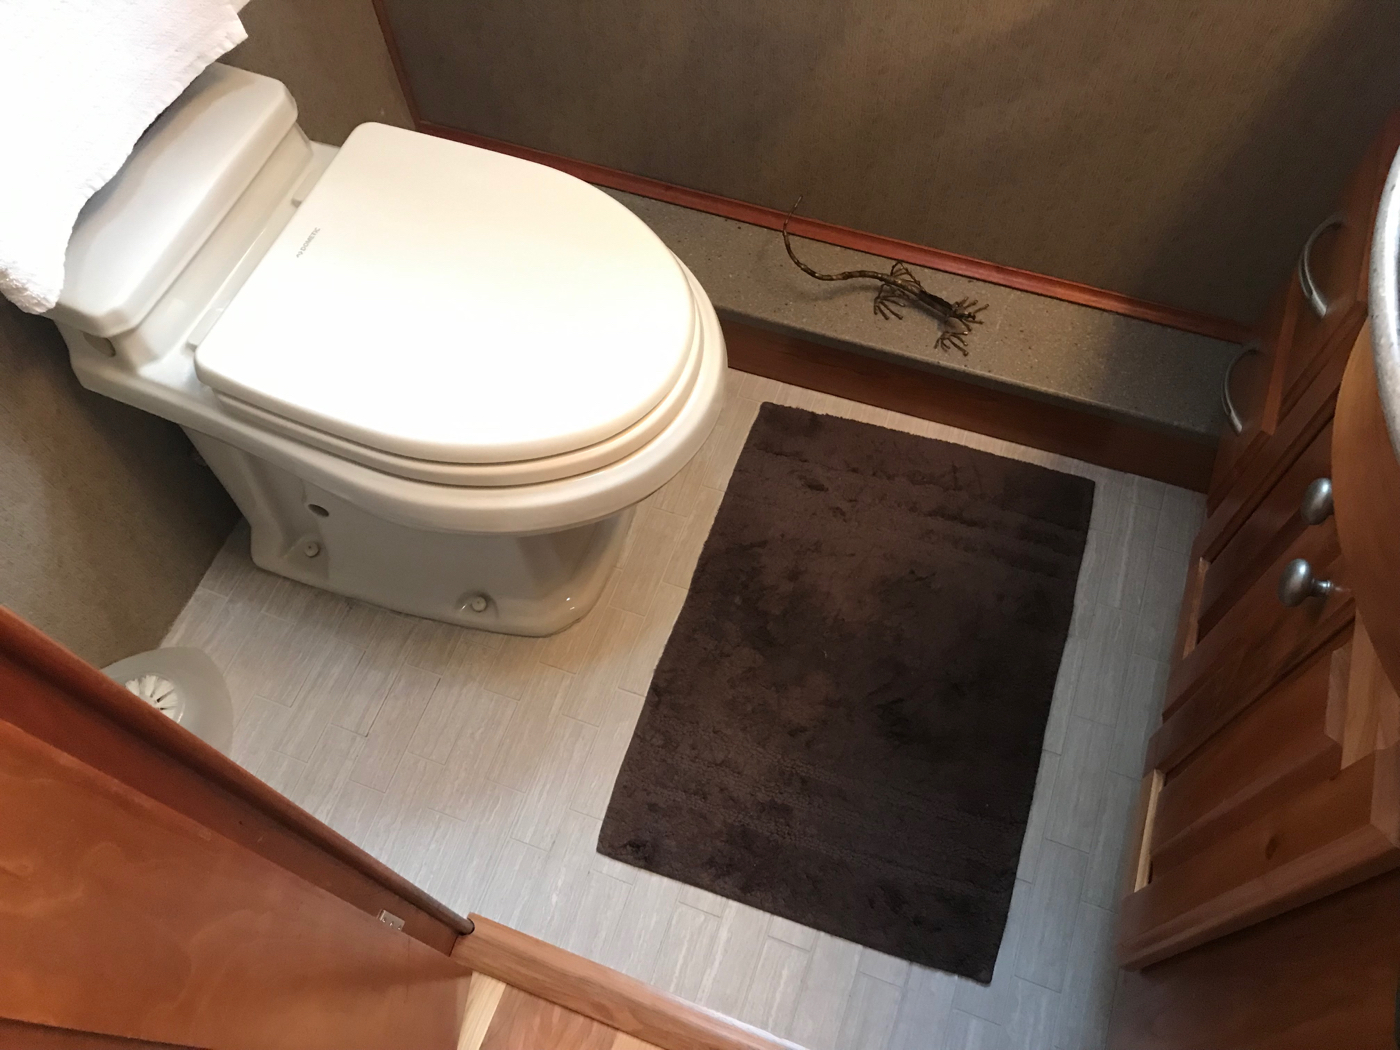
Another couple cleanings and it's ready for the toilet
Ahh, the throne is back
Then to install the door thresholds, the Corian shelf, and it's done.
Threshold in

All done!
I can tell you one more thing, Jan and I will not be doing any more floors in this coach, ever again.  That is it, folks.

Tuesday, February 5, 2019

Another quick update, we've been busy:-)

Our new InstaHot unit came and we got that installed.  Delightful, a real plug and play unit, took about 5 minutes!  Our Sani-Con pump was sounding worse and worse so when the new one arrived we took care of that.  Again an easy replacement, about 30 minutes. The new one works great, but wow, is it loud!  Going to have to rig a quieter package for it.
Out with the old Sani-Con pump
The project that took a bit longer was the replacement of our main heat exchanger, way in the back of our galley cabinet.  And, of course, I was blessed to have the diesel mechanic, Jan, to take care of most of the work.  It was even tight for her!

The old one

The new one
Just so you don't think I did anything, I want you to know I did all the wiring, and took care of the coolant lines, and yes, Jan did everything else:-)
Where the new wiring had to be connected

All done!
We also have just begun our trip planning for next year, fleshing it out and have even made a couple reservations.  Nowadays at the more popular destinations, it is necessary to make reservations earlier and earlier if you even want a chance of getting in.

This is a short post, but soon I will be sharing at least two more big items we are presently working on, I know, you can't wait.